PMS interfaces
WARNING! If you are using several PMS in parallel, it is recommended that you consult our support team before making any changes to a configuration.
Open the “Administration” application.
The Administration is always installed on the server and optionally on other PCs as well.
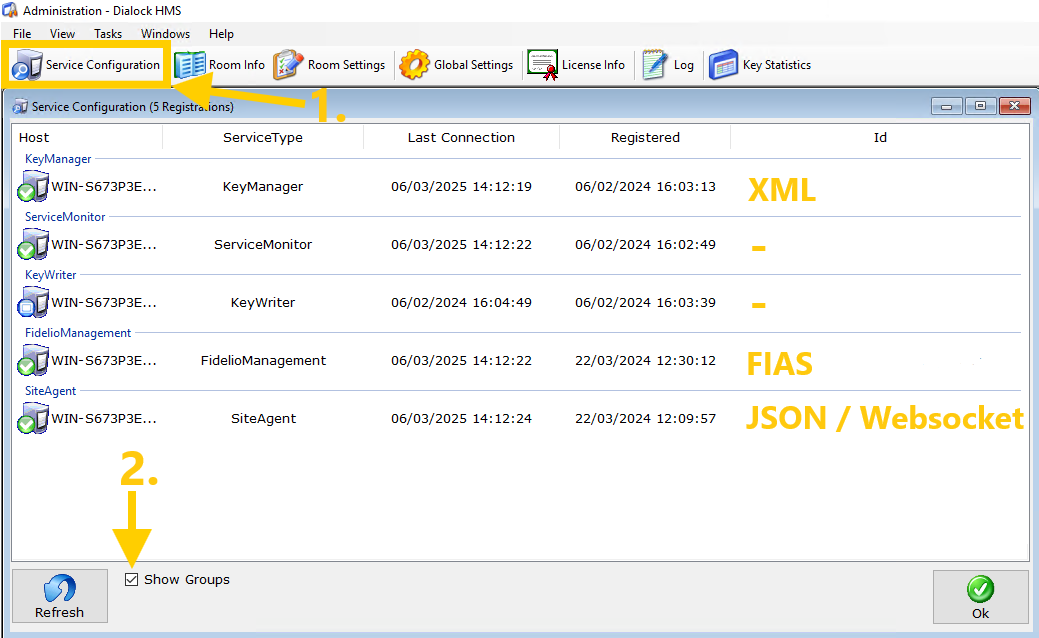
Now open the service configuration and tick the “Show groups” box. This will group all Dialock HMS services installed in your system according to the type of communication.
NOTE: You can ask your PMS provider which communication variant you use.
Possible communication variants are:
| Communication variant | Responsible Dialock HMS service | PMS Examples |
|---|---|---|
XML | KeyManagement, Distributor | ibelsa, Shiji, ... |
FIAS | (Additional-)FidelioManagement | MEWS, Opera, Protel, ... |
JSON / Websocket | SiteAgent | Code2Order, Hotelbird, Like Magic, ... |
I'm using...
NOTE: In this variant, the Dialock HMS acts as a server - meaning that the PMS connects to the Dialock HMS.
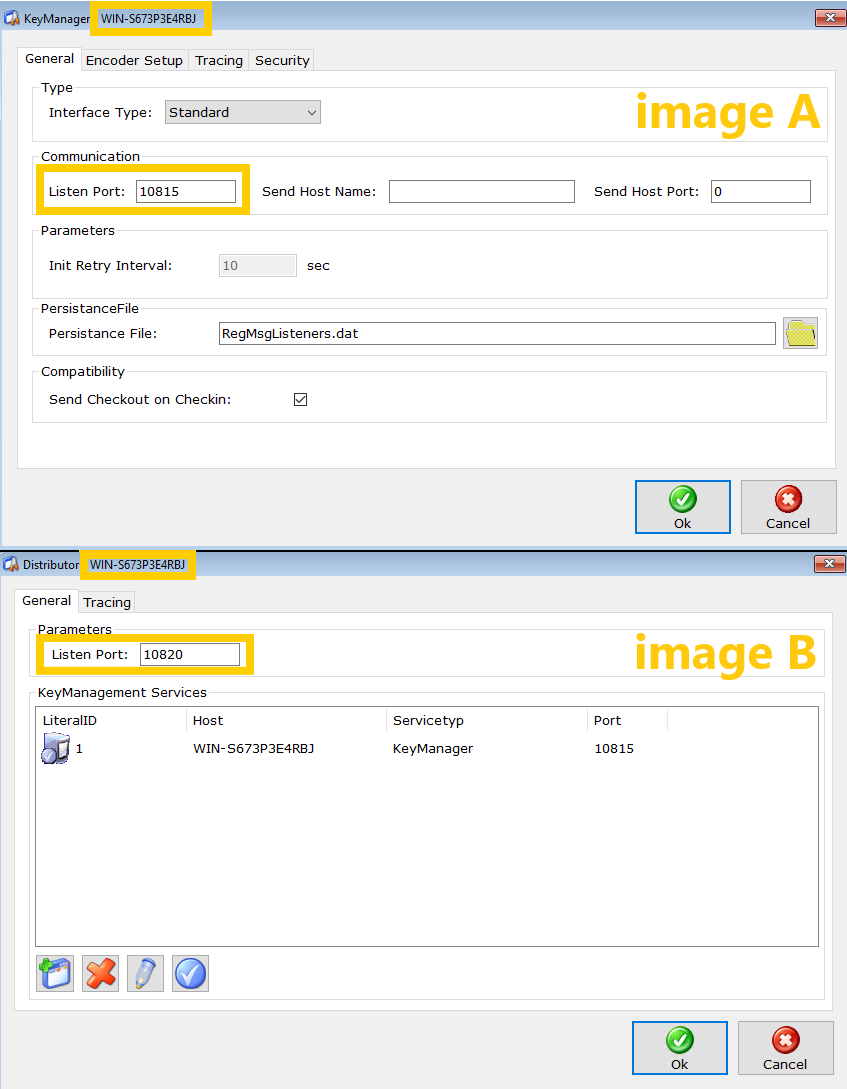
In case you still have a Distributor installed, double-click on the Distributor service to display the configuration (image B). Otherwise, double-click on the KeyManagement service (image A).
Share the now displayed Listen port and the DNS name in the title bar with the PMS so that the PMS can connect to us.
IMPORTANT! The Listen port must also be enabled in the firewall so that the PMS can establish the connection.
In the example, the details for the KeyManager (image A) are:
- WIN-S673P3E4RBJ (DNS)
- 10815 (Listen Port)
NOTE: In this variant, the Dialock HMS acts as a client - meaning that the Dialock HMS connects to the PMS.
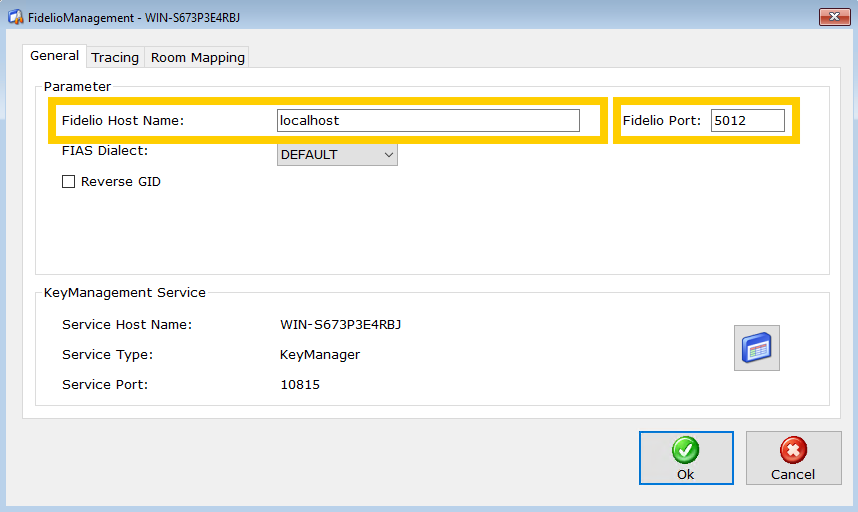
Double-click on the FidelioManagement service to display the configuration.
You can now check or adjust the Fidelio Host Name and the Fidelio Port as required. Both details can be obtained from your PMS.
IMPORTANT! The Fidelio Port must also be enabled in the firewall so that the FidelioManagement service can establish the connection to the PMS.
If you have made changes, confirm them with ‘Ok’ and then restart the FidelioManagement service:
NOTE: In this variant, the Dialock HMS acts as a client - meaning that the Dialock HMS connects to the PMS.
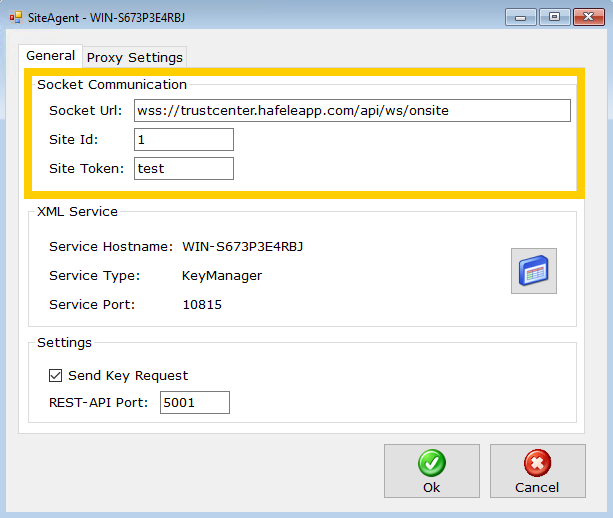
Double-click on the SiteAgent service to display the configuration.
You can now check or adjust the Socket Url, the Site Id and the Site Token. You can obtain all three details from your PMS.
WARNING: The Site Id and the Site Token are customer-specific details. Do not pass them on to third parties!
If you have made changes, confirm them with ‘Ok’ and then restart the SiteAgent service:
NOTE: In this variant, the Dialock HMS acts as a server - meaning that the PMS connects to the Dialock HMS.
IMPORTANT! The following steps must be carried out from the server.
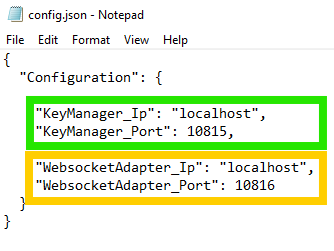
For the PMS Apaleo there is a separate Dialock HMS service with an outsourced configuration file - the ‘config.json’. This file can be found in a standard installation under:
C:\Program Files (x86)\Dialock\HMS\1.1\WebsocketAdapter
In order for the connection to be established correctly, the IP address of the server must be entered in the WebsocketAdapter_Ip. DNS names or ‘localhost’ are not permitted as inputs!
All other details normally remain unchanged. You can double-check the KeyManager_Ip and the KeyManager_Port in the KeyManager configuration by double-clicking on the KeyManager entry in the ‘Administration’ service configuration.
IMPORTANT! The WebsocketAdapter_Port must also be enabled in the firewall so that the PMS can establish the connection.
If you have made changes to the config.json, save them and then restart the WebsocketAdapter service:
Additional information for the PMS
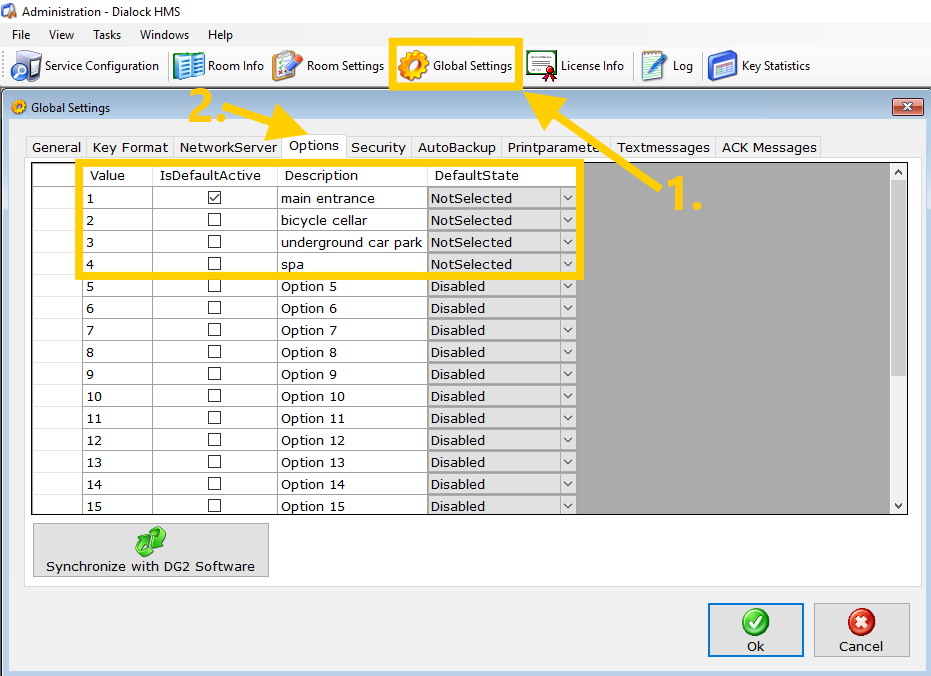
Click on ‘Global settings’ and select the Options tab.
Inform the PMS of the values and descriptions of all options that are not set to Disabled as DefaultState.
In the example, the relevant options are:
- 1 (main entrance)
- 2 (bicylce cellar)
- 3 (underground car park)
- 4 (spa)
NOTE:
IsDefaultActive (not available in all versions) means that the option is always added, regardless of whether the PMS requests the option.
The DefaultState is irrelevant for the PMS. It indicates whether the option is ticked by default in the KeyWriter or completely deactivated.
WARNING! If you are using the DG1 system in combination with network encoders, it is recommended that you consult our support team before forwarding the encoder ids to the PMS.
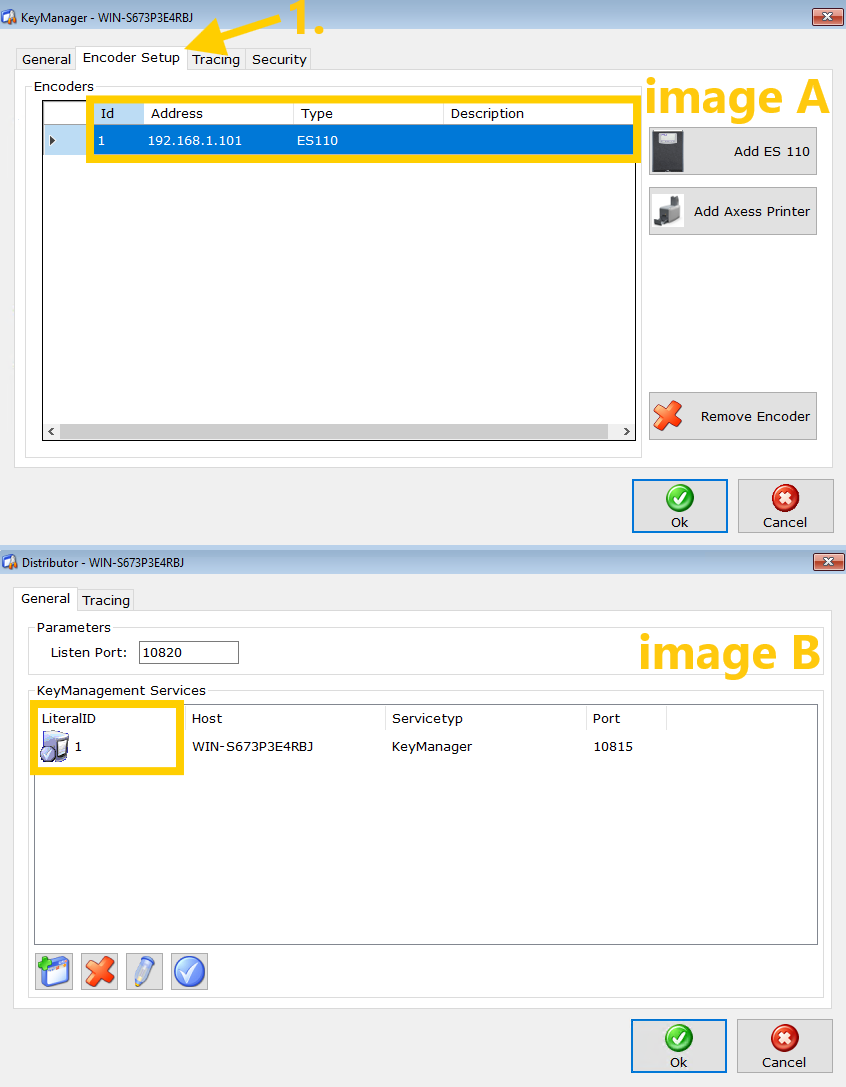
If you still have a Distributor installed, double-click on the Distributor service to display the configuration (image B). Otherwise, double-click on the KeyManagement service and switch to the ‘Encoder settings’ tab (image A).
Inform the PMS of the (Literal-) IDs that are now displayed and, if available, the descriptions so that the PMS knows to which encoder the respective key requests should be sent.
In the example, the relevant encoder is
- 1 (Id / LiteralID)
NOTE:
If an address is specified for the encoder in KeyManagement, it is a so-called network encoder. With network encoders, the address (192.168.1.101 in the example) is usually also shown on the display of the encoder, which makes it easier to identify it.