PMS
1. Choose location
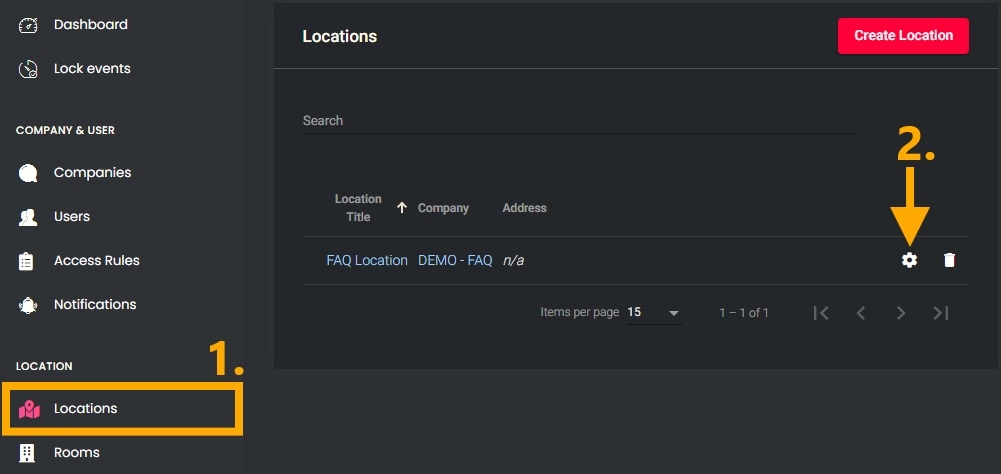
- In the left-hand menu, under the “LOCATION” section, open the “Locations” menu item.
- Click the gear icon next to the desired location to open the settings.

2. Select PMS

- In the “LOCATION MENU” on the right, select the “PMS” menu item.
- Under “PMS Type,” select the desired PMS partner.

Partner Systems:
MEWS
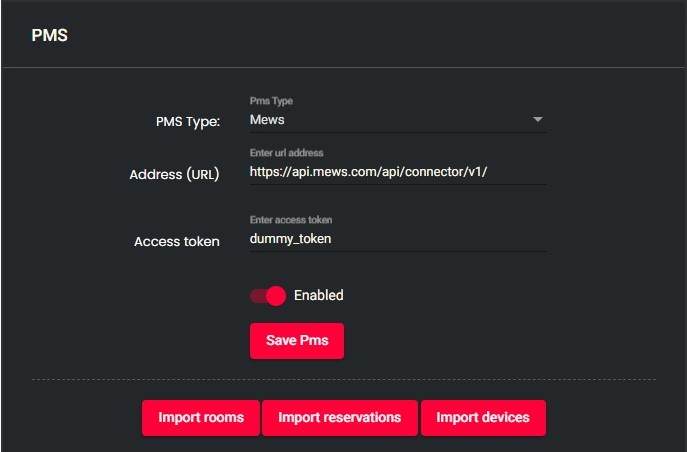
- Select “Mews” as the “PMS Type”.
- Enter https://api.mews.com/api/connector/v1/ as the “Address (URL)”.
- Enter the “Access token” provided by Mews.
- Enable the interface using the slider.
- Click the “Save” button to save the settings.

3. Imports
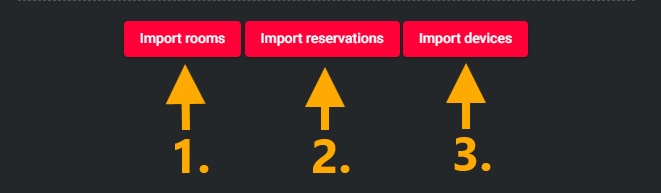
- After saving the PMS, perform all imports one after another:
- Use the “Import rooms” button to import the rooms from the PMS.
- Use the “Import reservations” button to import the reservations from the PMS.
- Use the “Import devices” button to import the PMS encoders.
NOTE: If you click “Import reservations” again, existing reservations will be skipped and will not be updated!

4. PMS Room Mapping
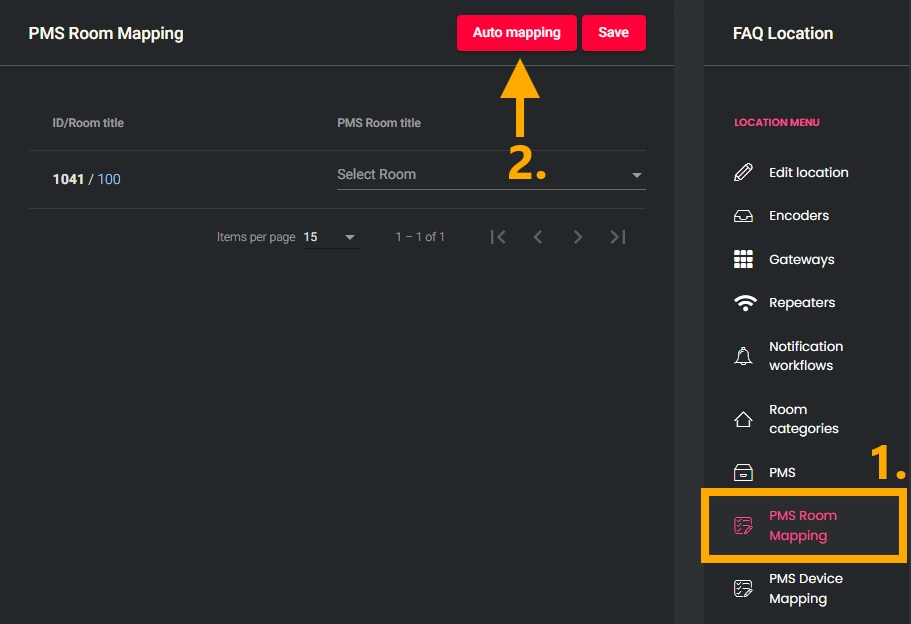
- In the “LOCATION MENU” on the right, select the “PMS Room Mapping” menu item.
- Click the “Auto mapping” button to load rooms from the PMS and assign them automatically.
- Verify that all rooms have been assigned correctly.
- Make manual adjustments if necessary.
- Click the “Save” button to save the assignments.

5. PMS Device Mapping

- In the “LOCATION MENU” on the right, select the “PMS Device Mapping” menu item.
- Assign the encoders stored in the PMS.
- Click the “Save” button to save the assignment.

Vendors
IMPORTANT! You must first disable all active vendor integrations before you can set up a new one!
1. Choose a location
- In the left-hand menu, under the “LOCATION” section, open the “Locations” menu item.
- Click the gear icon next to the desired location to open the settings.
2. Disable old interfaces
- In the “LOCATION MENU” on the right, select the “PMS” menu item.
- Under “PMS Type,” select “Disabled.”
- Click the “Save” button to save the change.
3. Select Vendor
- In the “LOCATION MENU” on the right, select the “Vendor integrations” menu item.
- If any integrations are currently active, deactivate them.
- In the section for the desired PMS, enter any necessary information.
- Click the “Setup” button.
- Follow the setup steps for the interface.
Partner Systems:
Apaleo
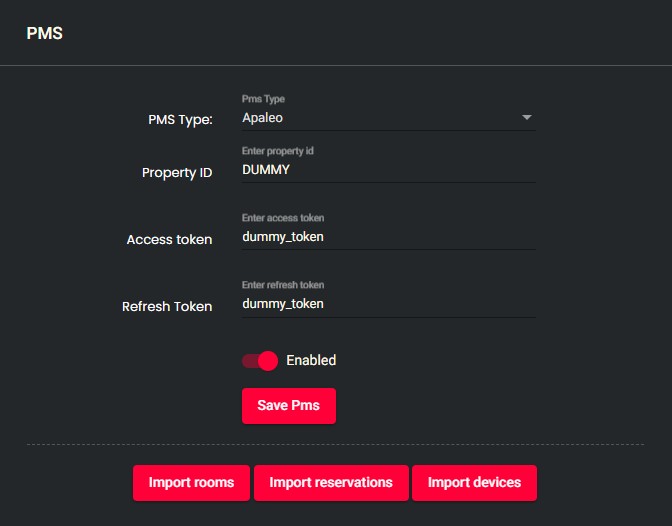
- Setting up PMS:
- In the “LOCATION MENU” on the right, select the “PMS” menu item.
- Find the Apaleo Property ID
- In Apaleo, click the building icon > select “Property” to switch to the Apaleo property, then click the URL at the top of the address bar.
- The Property ID is the last part of the address and always consists of uppercase letters
For example:
https://app.apaleo.com/ABC -> Property ID: ABC
- Enter/verify the “Access token” received from Apaleo.
- Enter/verify the “Refresh token” received from Apaleo.
- Activate the interface using the slider.
- Save the settings using the “Save” button.
- Set up Vendor:
- In the “LOCATION MENU” on the right, select the menu item “Vendor integrations.”
- Check the boxes next to “webhooks.reservation.push” and, optionally, “reservation.mobile.app.url,” then confirm.

4. Imports
- After saving the PMS, perform all imports one after another:
- Use the “Import rooms” button to import the rooms from the PMS.
- Use the “Import reservations” button to import the reservations from the PMS.
- Use the “Import devices” button to import the PMS encoders.
NOTE: If you click “Import reservations” again, existing reservations will be skipped and will not be updated!
5. PMS Room Mapping
- In the “LOCATION MENU” on the right, select the “PMS Room Mapping” menu item.
- Click the “Auto mapping” button to load rooms from the PMS and assign them automatically.
- Verify that all rooms have been assigned correctly.
- Make manual adjustments if necessary.
- Click the “Save” button to save the assignments.
6. PMS Device Mapping
- In the “LOCATION MENU” on the right, select the “PMS Device Mapping” menu item.
- Assign the encoders stored in the PMS.
- Click the “Save” button to save the assignment.