How do I create and change personal keys?
Create personal key
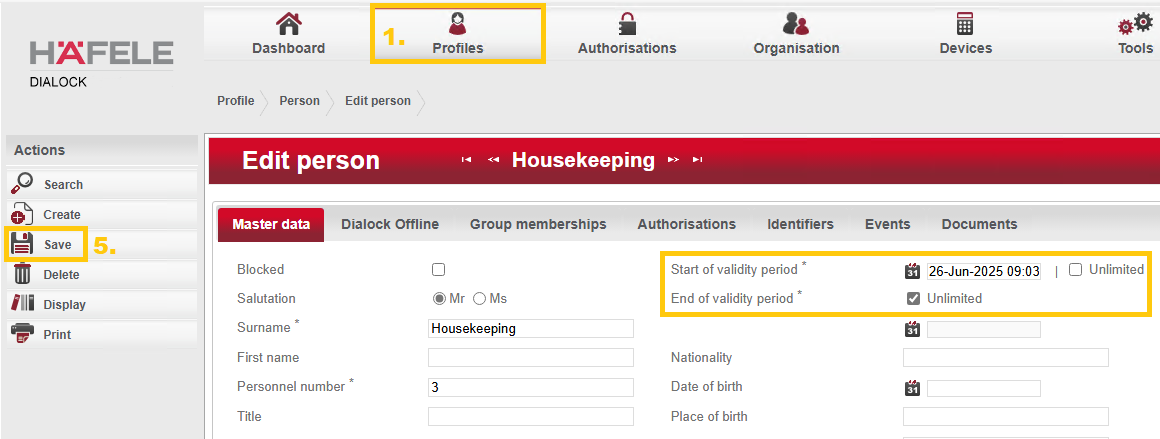
Step 1 - Create person
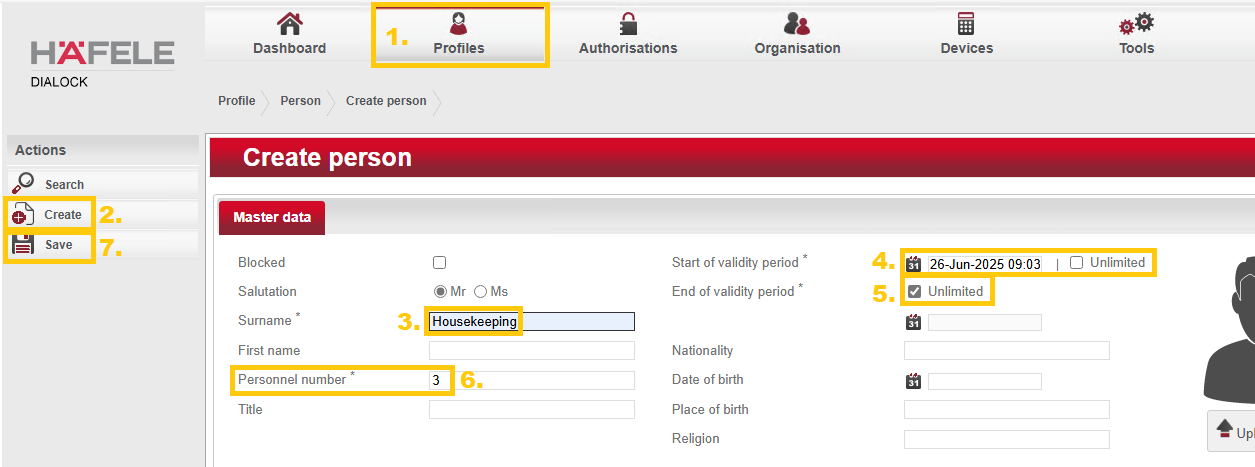
- Navigate to “Profiles”>“ Persons”.
- Select “ Create” in the left-hand actions menu.
- Give the person a name.
- (optional) Set the "Start of validity period" to unlimited. (particularly useful for management, building services or fire department)
- (optional) Set an "End of validity period" or leave it at unlimited.
- Remember the personnel number. (is automatically assigned by the system)
- Save the details in the left-hand actions menu.

Step 2 - Apply special privileges (Toggle, MDU, DND)
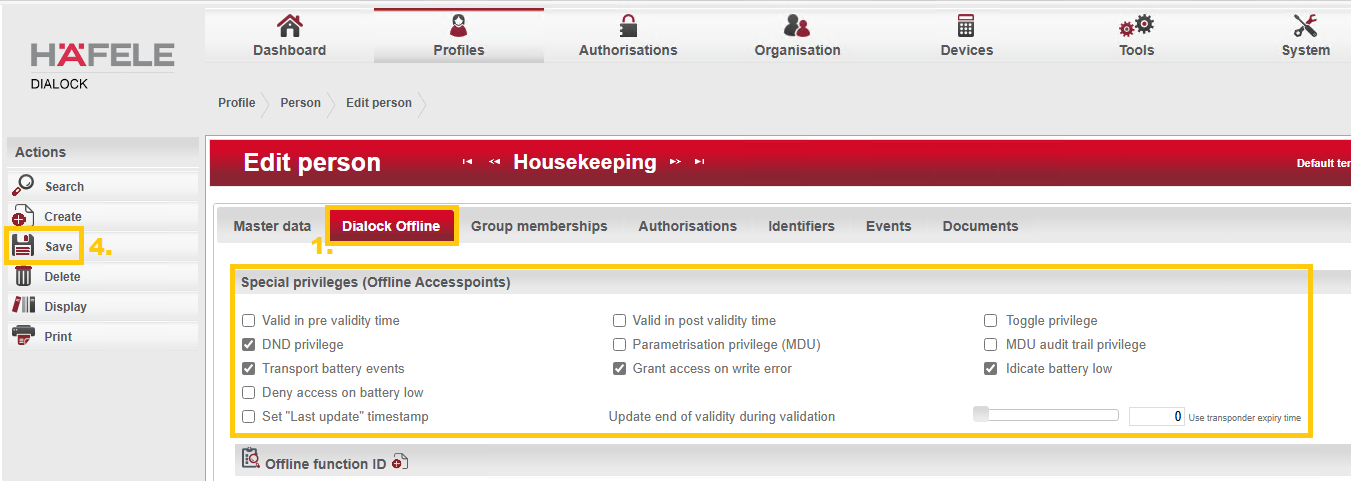
- Click on "Dialock Offline".
- If necessary, scroll to "Special privileges".
- Select the privileges that should apply to the person.
NOTE: A more detailed explanation of the most important privileges can be found further down in this article. - Save the settings via the left-hand actions menu.

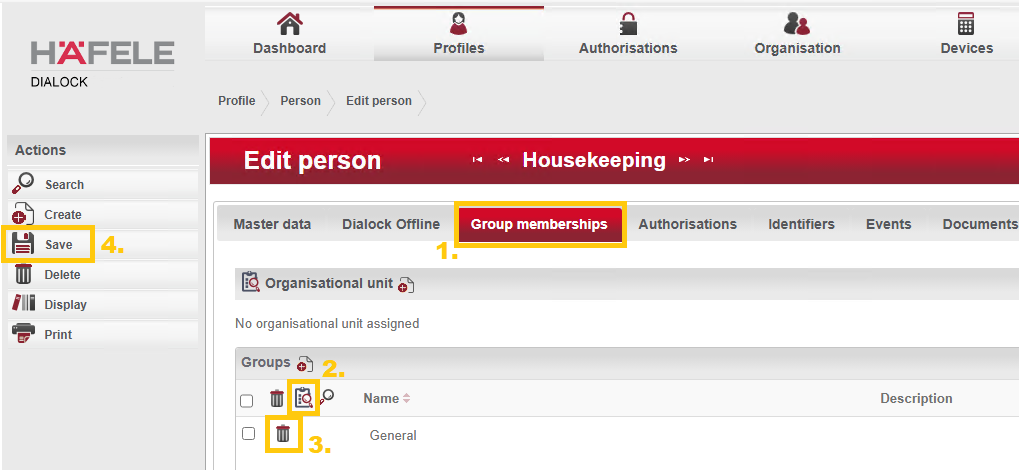
Step 3 - Apply group access rights
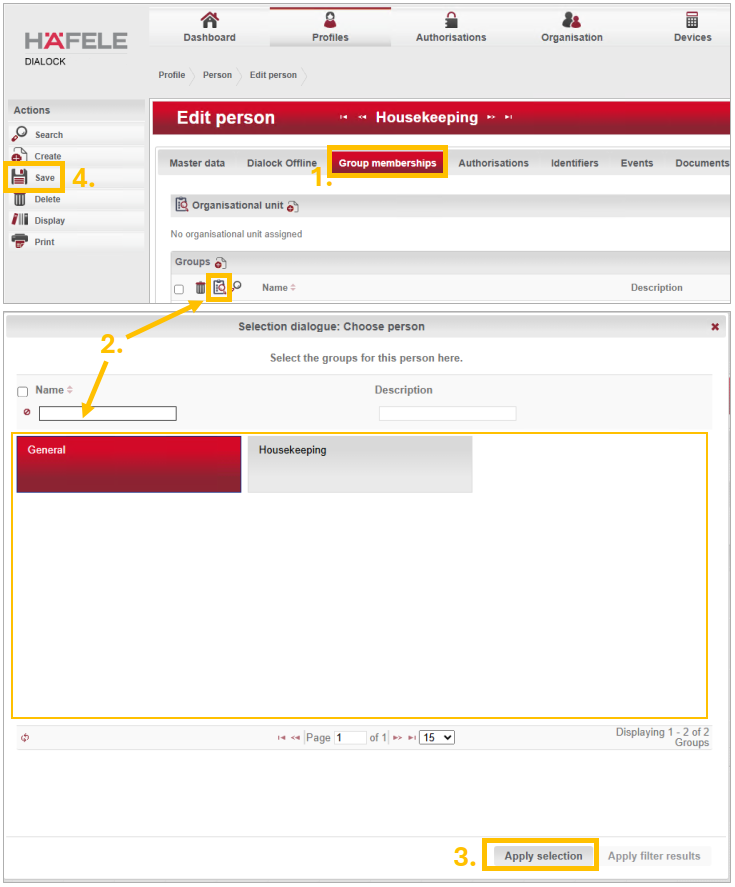
- Click on "Group memberships".
- In the "Groups" section, click on the "clipboard with magnifying glass" icon and select the appropriate locking group.
- Confirm the selection.
- Save the settings via the left-hand actions menu.

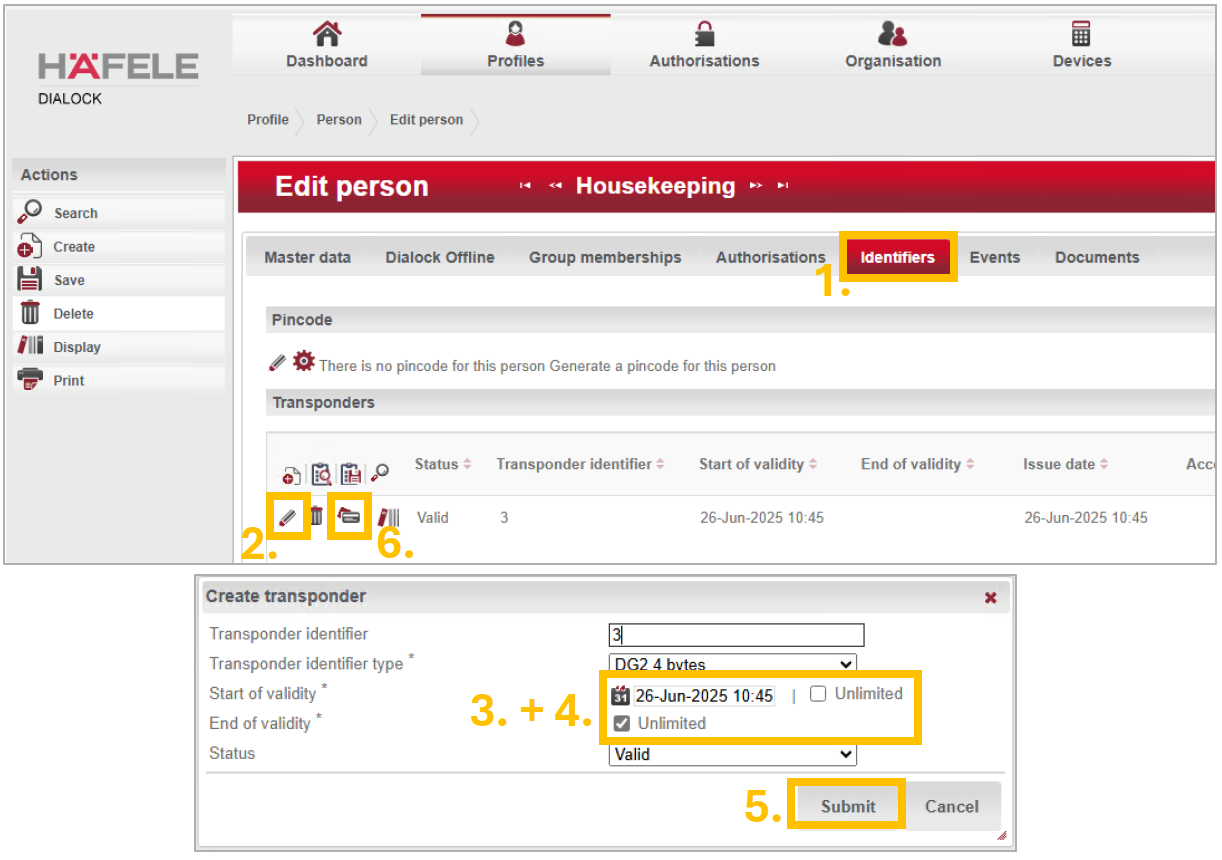
Step 4 - Create and issue key
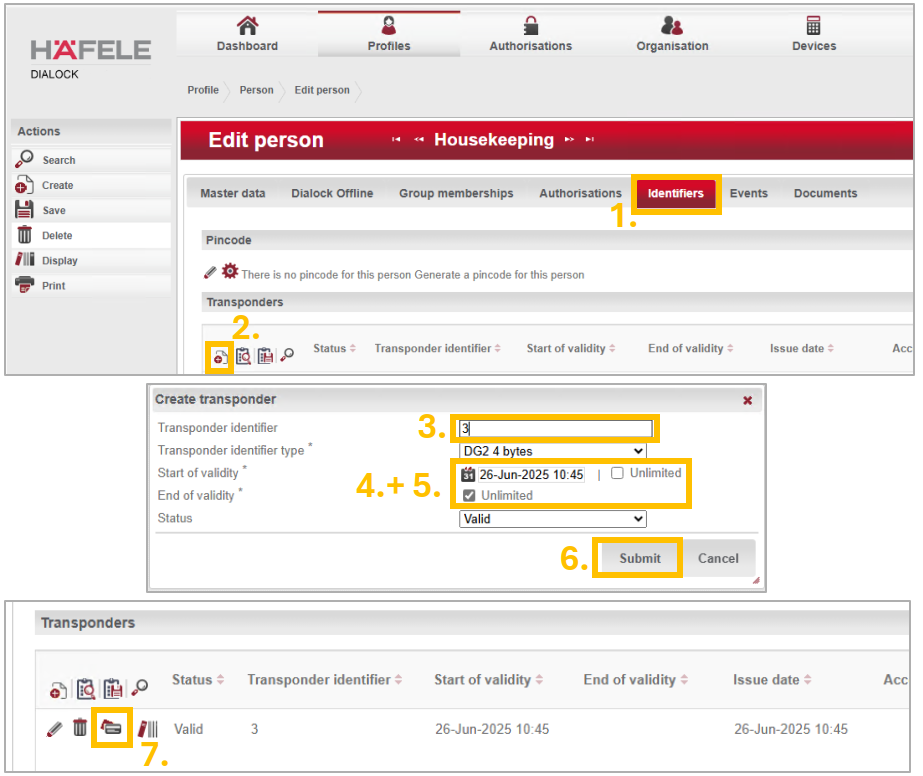
- Switch to “Identifiers”.
- Click on the plus symbol in the "Transponders" section.
- Enter the personnel number which you have remembered as the transponder identifier.
- (useful for building services, management, fire department, etc.) Set the "Start of validity" to unlimited.
- (optional) Adjust the end of validity or leave it at unlimited.
- Confirm the settings and press "Save".
- Press the "check card symbol" in the line of the newly created transponder and follow the instructions on the screen.
- The new transponder has now been created.

Change personal key
Step 1 - Check Master data
- Navigate to “Profiles”>“People”.
- Select the relevant person from the list.
- Check whether “Start of validity” and “End of validity” are still valid.
- Change them if necessary.
- Save any changes using the actions menu on the left.

Step 2 - Adjust special privileges (Toggle, MDU, DND)
- Click on "Dialock Offline"
- If necessary, scroll to "Special privileges"
- Select the privileges that should apply to the person.
- Save the settings via the left-hand actions menu.
A more detailed explanation of the most important privileges can be found further down in this article.
Step 3 - Adjust group access rights
- Click on "Group memberships"
- Assign another group:
- In the "Group" field, click on the "Clipboard with magnifying glass" icon and select the appropriate locking group.
- Confirm the selection.
- Remove existing group:
- In the Group field, click on the trash can icon in the corresponding line.
- Confirm the action.
- Save the settings via the left-hand actions menu

Step 4 - Create and issue key
- Switch to “ Identifiers”.
- In the "Transponder" field, click on the "pencil symbol" next to the relevant transponder.
- (useful for building services, management, fire department, etc.) Set the "Start of validity" to unlimited.
- (optional) Adjust the end of validity or set this to unlimited.
- Confirm the settings and press "Save".
- Press the "Check card symbol" in the line of the transponder and follow the instructions on the screen
- The transponder is now adjusted.
Important Privileges
Toggle privilege | Authorizes the personnel doors to be switched to “Toggle” by holding the key for a long time. |
DND privilege | Cancels the “Do not disturb” function of the guest room door if the key is held for longer than 5 seconds. |
Parametrisation privilege (MDU) | Authorizes the reprogramming of the terminals with the MDU. |
MDU audit trail privilege | Authorized to read out the locking protocols. |