Software migration
WARNING: The Dialock 1 software is a discontinued software product. The installation on operating systems running Windows 7 and higher is therefore at your own risk!
Preparation
- Open the Dialock Personnel software on the existing PC from which you want to migrate.
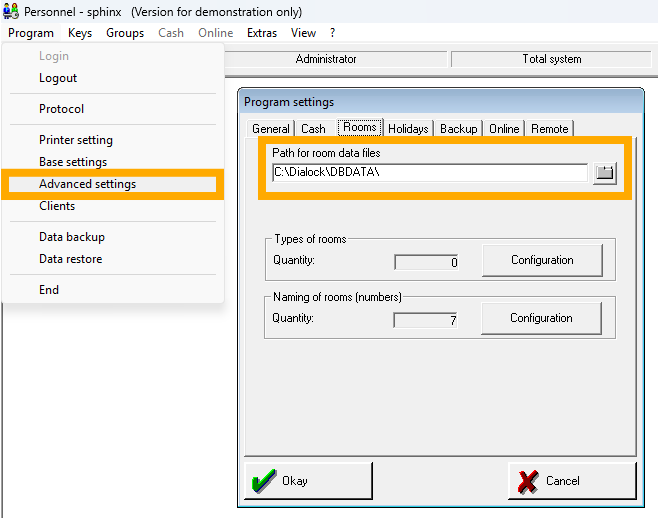
- Navigate to “Program” > “Advanced Settings” > “Rooms“ > “Path of Database Files.”
- Check the specified path.
If the path does not begin with C:, a network drive may need to be shared on the new PC to enable connection to the database.
Copy the “Dialock” folder from the existing PC from C:\ to the same location on the new PC—i.e., back to C:\
NOTE: If you cannot find the Dialock folder on C:\, copy the Dialock folder from the path specified in “Path of database files.”
Close all Dialock programs that are still open:
- Service
- Personnel
- Hotel/Clinic
- Unplug the encoding station from the existing PC.
- Then connect the encoding station to the new PC on which the software will be installed.
- Check whether the driver for the encoding station was automatically installed and install it if necessary.
Installation
Setup
Download the required setup files via the following link:
- Run the downloaded setup-dialock.exe file.
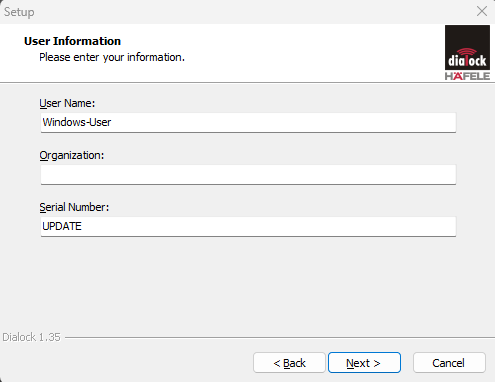
- When prompted for user information, enter “UPDATE” as the serial number. You can leave the organization field blank.
NOTE: By entering the serial number “UPDATE,” the installer automatically recognizes the previously installed components via the existing Dialock folder and installs the latest version.
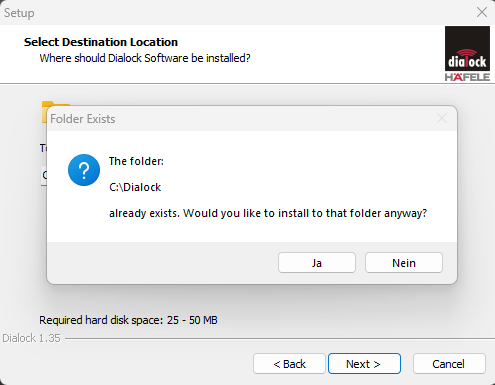
- The target folder should now be the Dialock folder that you have just copied to C:\ on the new system.
- When you click “Next,” a message should appear stating that the folder already exists. If the message does not appear, check that the path to the Dialock folder has been entered correctly.
WARNING: If you do not receive the notification and continue with the installation process, the installation will not complete correctly because the installer cannot read the configuration from the existing folder.
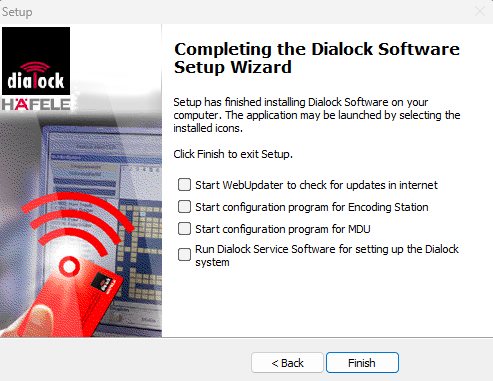
Uncheck all the boxes displayed before you finish the installation.
Functional test
- Open the Dialock Personnel software using the shortcut you created on the desktop.
NOTE: If you did not create a shortcut, use dlpw.exe located at: C:\Dialock\PERSONNEL\dlpw.exe - You will now be asked to log in with your login key. Check whether your login key is recognized.

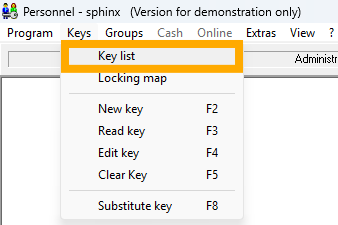
- Open the list of all existing keys via “Keys” > “Key list”.
- Check whether the list contains any recent entries.
- Switch to the service software via “Tools” > “Dialock Service Program.”
- Click on the “Terminals” button to view the list of all available terminals.
- Check whether the list contains any recent entries.

Set up backup
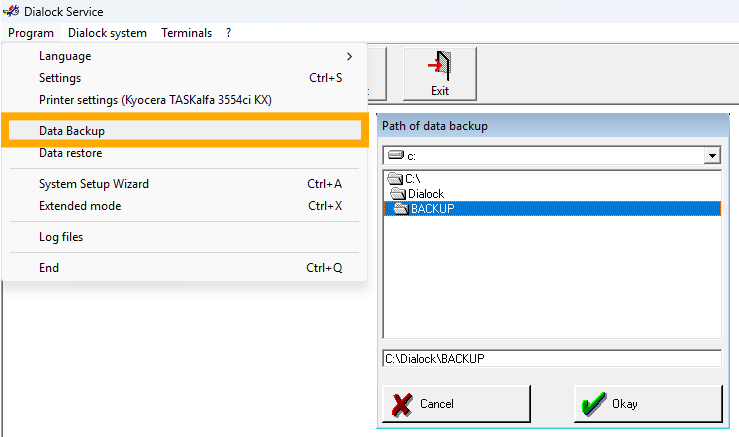
- Navigate to “Program” > “Data Backup” to perform a manual backup.
- Now select the desired location where the backup should be created.
NOTE: It makes sense to save the backup on a USB stick, for example, so that it is accessible in the event of a PC failure.
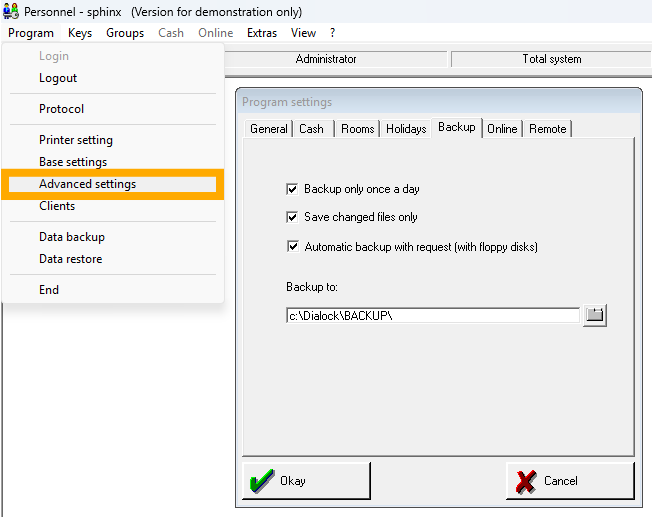
- Navigate to “Program” > “Advanced Settings.”
- Switch to the “Backup” tab. Here you can now configure the desired backup settings. We recommend that you check all the boxes.
NOTE: It makes sense to save the backup to a USB stick, for example, so that it is accessible in the event of a PC failure. - Optional: Select “Program” > “Data backup” to perform a manual backup.
