How do I read and import terminal logs?
What are terminal logs?
All events that occur at the terminal are documented in the terminal log. This includes, for example, door opening attempts or entries with the MDU (hand-held device). For example, it records when an event took place and which key/device triggered it.
The logs can therefore be interesting e.g. for tracing past accesses.
Terminal logs are retrieved using the MDU and must then be imported into the Dialock 2 web interface for viewing.
IMPORTANT: The internal memory of the terminals is limited. A maximum of 1000 entries are possible. In an emergency, logs should be read out promptly in the case of highly frequented terminals!
How do I read terminal logs?
IMPORTANT:
First check the current time on the terminal and make a note of any deviation from the actual time. This may be relevant for interpreting the logs later. Click here for instructions on how to read the time.
You need an MDU (handheld device) and a privileged key to read the logs.
- Select the menu item “Audit Trails” under “Terminal” on the MDU.
- Hold the MDU to the reader of the desired terminal.
- MDU now displays “Authorize at terminal”.
- Take the MDU to the side and hold the privileged transponder in front of the sensor (the terminal should beep once and light up white)
- Hold the MDU up to the terminal reader again. The message “Data exchange” appears on the display.
- Wait until the transfer has been completed. The MDU then reports “Exchange done”.
How do I import the logs into the Dialock 2 software?
- Connect the MDU to the PC. The charging symbol must now be visible on the MDU. (If this is not visible, check the cable again or return to the main menu on the MDU)
- Open the Dialock software in the usual web browser.
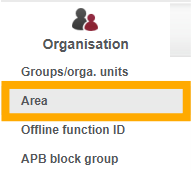
Open “Organization” -> “Area” in the software.
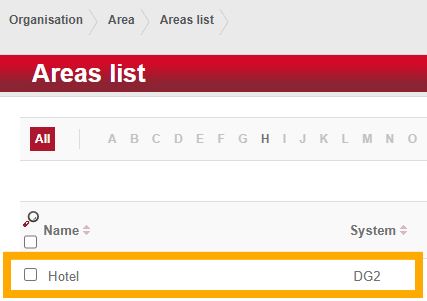
Select the relevant area from the area list (in most cases, only one area is created)
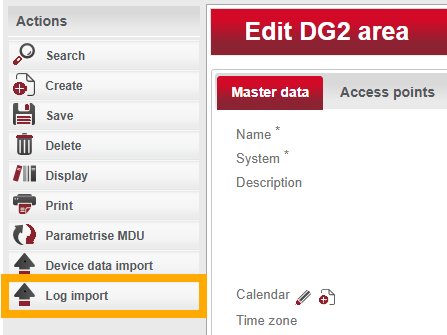
From the Actions menu on the left-hand side of the screen, click the “Log import” option.
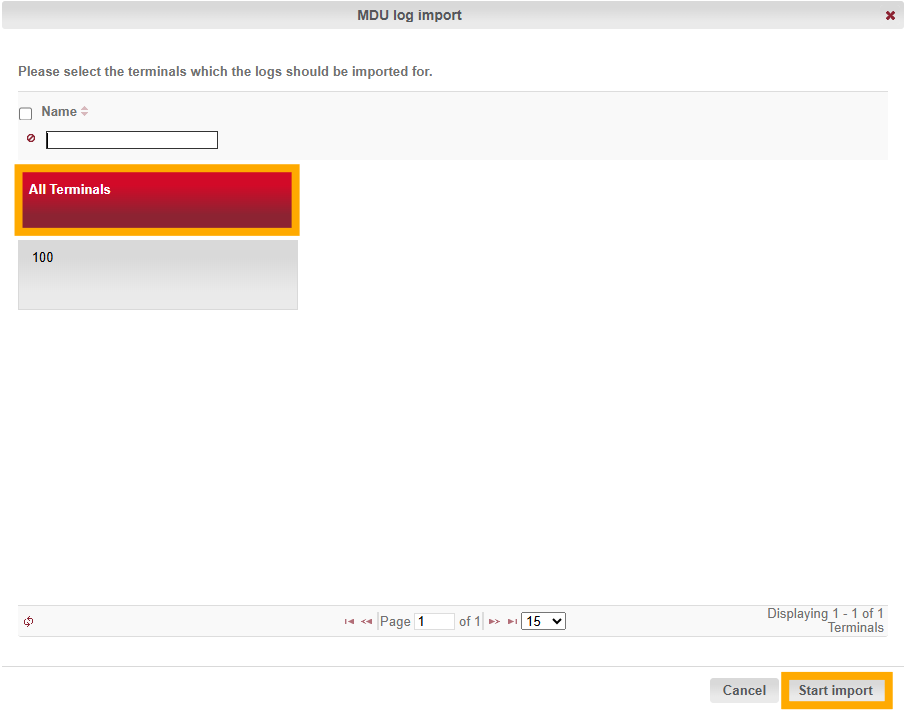
Select “All terminals” from the newly opened window and click on “Start import” to begin the transfer.
If the import was successful, you should see the message “Logs were successfully imported to the server”.

Where do I find the terminal logs in the software?
Via terminal list:
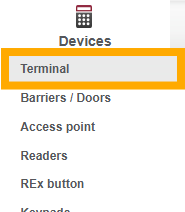
Navigate to “Devices” > “Terminal”.
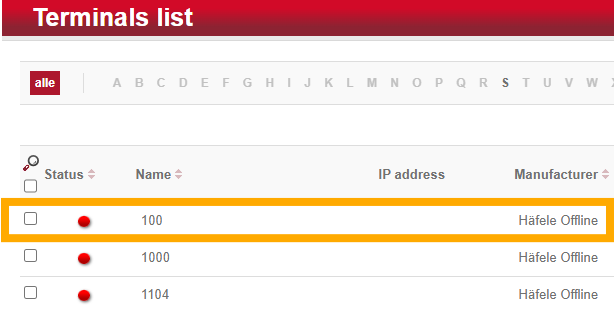
Select the desired terminal from the terminal list.
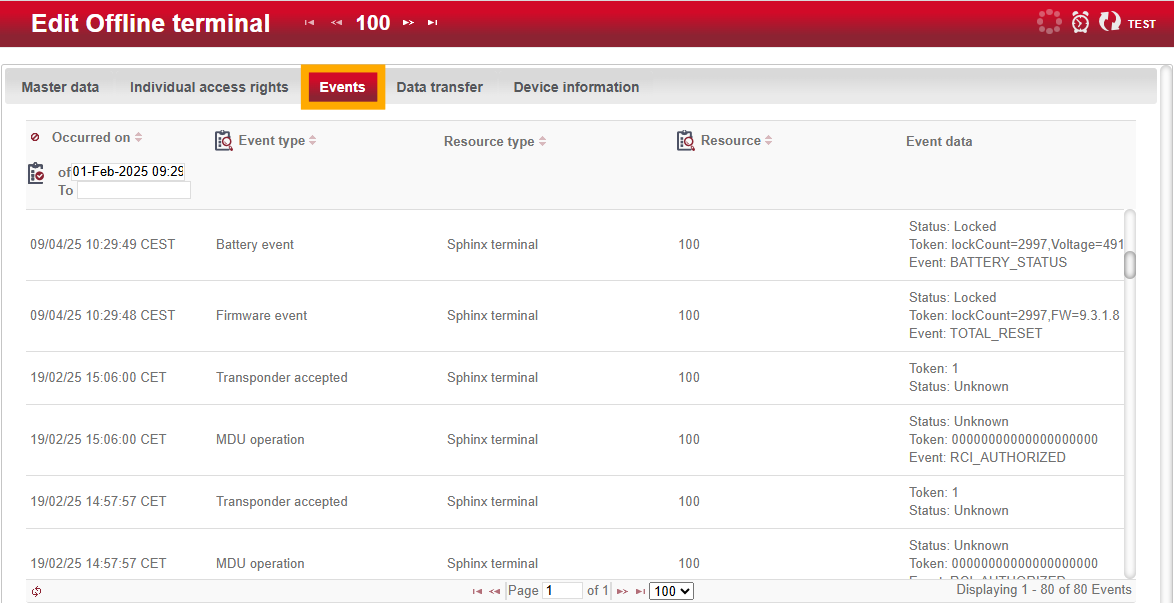
Switch to the “Events” tab within terminal editing. Here you will find the list of imported logs.
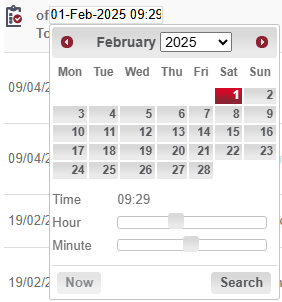
If you are looking for a specific time range, you can filter using the calendar entries for “from” and “to”. Press Search to confirm the entry.
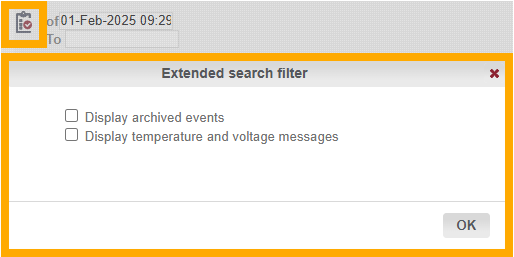
If not all expected events appear, you can activate the advanced search filter via the clipboard symbol in the top left-hand corner. Check the two options shown to display all other entries.
Via Event log:
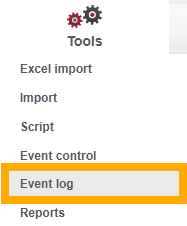
Navigate to “Extras” > “Event log”.
Here you will find all terminal protocols. If you are looking for the protocols of a specific terminal, you can filter this using the “Resource” column.
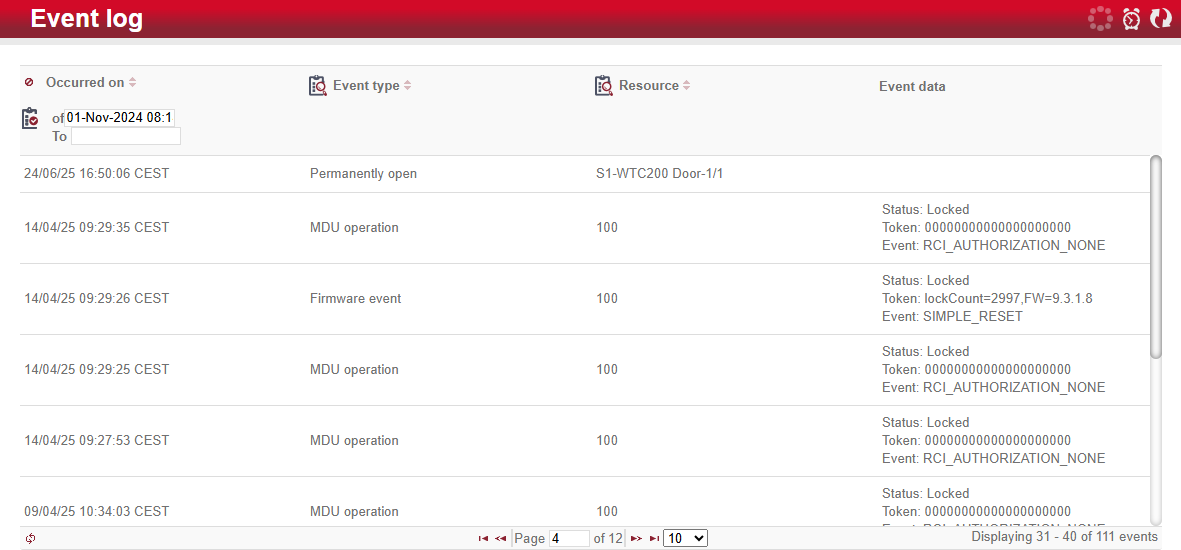
If you are looking for a specific time range, you can filter using the calendar entries for “from” and “to”. Press Search to confirm the entry.

If not all expected events appear, you can activate the advanced search filter via the clipboard symbol in the top left-hand corner. Check the two options shown to display all other entries.
